2020年9月8日 星期二

2020年7月24日 星期五
Get free US local phone number
Get free US local phone number for receiving calls and text or for phone verifications From PC.
So now I will tell you the trick to getting a US number, although this service is only allowed for USA citizen but now we can get it from outside of the US with this trick.
First, you need to understand that before getting this number, we must have a Local US phone number for verification purposes, but fret not (if you don't have one), I'll also tell you the solution. Here is the method for getting a local U.S. number.:
1. Sign Up on callcentric.com/login
Under the New customers please sign up here
2. Fill all the fields with your information and click continue.
3. Now verify your email and enter your own address or Get a free USA address from here: link
Next click on I agree
4. Click on “Go to My CallCentric” now under your username there will be CallCentric # in this format 1777*******
5. Open http://phone.ipkall.com and fill information :
- Choose your account type : SIP
- Choose Area Code for your IPKall Number: (253)
- SIP username : Now put your CallCentric # here which will be like this 1777*******
- Host name or IP address : callcentric.com
- And use previous email address and password which you used on CallCentric.com and Click submit.
6. Now check your email address you will receive an email from info@ipkall.com in which your detail will be given. At the end of the first line there will be your local US phone number but you need to register this number.
7. Download Express talk from here
8. When you are installing express talk, select the default option for all screens. At “SIP Setup” option, select “Yes, I already have a SIP account” and enter all your detail as you fill in Step "5" and log in.
9. After your successful login your US local phone number will be registered automatically. Which you can see on CallCentric.com home page under "Balance" tab saying "Your phone is registered"
2020年7月23日 星期四
Free Virtual Phone Number Generator Sites
7sim
Another free website providing free virtual numbers. It has more than 70+ numbers online every day. And also the number is auto changed every 3 hours. The real advantage is, that it can auto block messages from the payment systems and paid subscriptions. Also, it has 30 countries to choose from.
Receive-smss
Very easy to use because it doesn’t require user to login or signup. Simply just use any virtual phone number shown in the home page itself. Also voice messages are supported. Speed is pretty good, since messages are instantaneous. Easily handle multiple numbers at same time.
- No need to register.
- Many countries are supported.
- Messages are deleted after 24 hours.
Receive SMS online HongKong +852
10 Free HongKong temporary mobile numbers in total
Free-phone-num
Simple and best site to get virtual phone numbers. Because it is always online and provide you about 10+ plus working numbers online. It only provides US and Canada numbers, but pretty much all sites need a number from US, so it can work like charm. Also you can be able to send text from that temporary number as well.
Bonus (SMS Receive for android)
If you are a developer or tester, then you have to use this virtual phone number daily. So every time you have to visit the website and check for the numbers right? Don’t worry there is an app for android to handle your virtual phone numbers easily and also copy-pasting is much easier.
Express Talk VoIP Softphone
Express Talk VoIP Softphone
Source : https://www.nch.com.au/talk/index.html
Source : https://www.nch.com.au/talk/index.html
Make phone calls using your PC or Mac
- Works with almost any VoIP gateway provider or office PBX
- Features include conferencing, recording, and voice commands
- Configure up to 6 telephone lines on Express Talk
Download Express Talk Softphone for Windows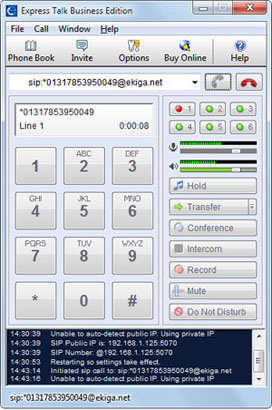 |
Google Voice # with my phone number
Source : https://support.google.com/voice/thread/17955571?hl=en
ECH NOTE: [CRITICAL]: There is a bug in the Google Voice number verification process whereby a successfully verified number may not be successfully applied to the account following verification. Nothing will be communicated to the user to indicate that said verified number has been rescinded. No explanation for the revocation of said verified number will be provided.
Steps to Reproduce:
1. Follow the appropriate steps to create a Google Voice number using your Google account and an existing phone number for verification.
2. Verify said number via text or automated phone call.
3. Observe in web browser that number creation is successful. This confirmation will be posted on a page with URL https://voice.google.com/u/5/signup.
The message will be: "Phone number added. (***) ***-**** has been successfully linked to your account and will ring when someone calls your Google Voice number."
4. Click Finish
5. Observe that the successfully linked number does not show up in your account. Nothing is communicated to the user to indicate why the successfully linked number has vanished.
Actual results:
The successfully linked number does not show up in your account. Nothing is communicated to the user to indicate why the successfully linked number has vanished. Your phone number has now been burned and cannot be used again for Google Voice number verification.
Expected results:
The successfully linked number should show up in your account. If something has prevented the link from being successful, something should be communicated to the user to indicate why the successfully linked number has vanished. Preferably this should be messaging should be accomplished using a combination of pop-up error messaging and email/text notification.
Workaround:
None. Some successfully verified numbers will result in this kind of false positive. This is a known bug that there are no plans to fix. In this case, the user must keep in mind that they should never believe everything they read on the Internet. Just because you receive a notification that an action on your account has been successful does not mean that the communicated success has occurred!
2020年7月20日 星期一
How to Reset Your Forgotten Password in Windows 10
Source: https://www.howtogeek.com/222262/how-to-reset-your-forgotten-password-in-windows-10/


First, start by booting your Windows 10 installation into the setup by changing the boot order in your BIOS to take priority with the CD, or use the ISO as a startup disk instead.
You’ll need to boot from Windows 10 installation media to do this. First, you’ll need to create Windows 10 installation media on a USB drive or DVD. Once you have, change the boot order on your PC and boot from the USB drive or disc.
Once the setup begins, hit Shift+F10.
This will bring up a command prompt. From here, we’re going to use the command prompt to replace the Utility Manager at the login screen with cmd.exe with the following commands:
move d:\windows\system32\utilman.exe d:\windows\system32\utilman.exe.bakcopy d:\windows\system32\cmd.exe d:\windows\system32\utilman.exe
Once this is complete, use the command “wpeutil reboot” to restart the machine.
After you’re back at the login screen, click the Utility Manager. If everything went right, you should see a cmd.exe launch like the image below.
This is the prompt you’ll use to create a new administrative user from the login screen. Type in the following commands, replacing with the name you’d like to assign to the new account (no carrots).
net user <username> /addnet localgroup administrators <username> /add
Now close the prompt, reboot, and you should see your new user in the login screen.
2020年4月7日 星期二
How do I get Chinese handwriting on Windows 10?
Source :
https://answers.microsoft.com/en-us/windows/forum/windows_10-other_settings/chinese-handwriting-input-for-windows-10/6e4aa7e6-5996-4356-a5eb-bd12e9aad787


 The Cantonese Phonetic input method (Jyutping) was added in an automated update to Windows 10, but it cannot be selected from the menu shown above.
https://answers.microsoft.com/en-us/windows/forum/windows_10-other_settings/chinese-handwriting-input-for-windows-10/6e4aa7e6-5996-4356-a5eb-bd12e9aad787
. Open the Start menu and select Settings.
b. Then in Settings, select "Time & language" (After this is set up, you can just click at the bottom of the input methods menu. And a right-click on the old-style task bar input method button goes even deeper).
c. This will take you to the Time & Language settings. In the "Region and Language" section, under "Languages", select "Add a language":
d. Scroll to the right as needed to find "Chinese (Simplified)" and/or "Chinese (Traditional)" in the list:
"Chinese (Simplified)" actually includes a Traditional character option, and "Chinese (Traditional)" includes a Simplified character option, each with some limitations.
The default Chinese "region" choices are mainland China and Hong Kong for most users of an English-language Windows release. Microsoft has put the Traditional character display language pack downloads only in the Hong Kong settings. (Unlike Windows 8 the Taiwan and Macau locales do offer the handwriting feature, and all include speech.)
When you're done, back in the Languages section you'll find the regions you've selected. When you click on their names, you'll be rewarded with the three buttons you see here. For now, select "Options":
The default keyboard for PRC and Singapore is Microsoft Pinyin. The default keyboard for Taiwan is Microsoft Bopomofo, but for Hong Kong it's Microsoft Quick (a quicker Cangjie). Click "Add a keyboard" to select another from the menu. A keyboard that has been selected can be removed by clicking on the name and selecting "Remove".
"MS Bopomofo" supports Hanyu Pinyin in addition to Zhuyin Fuhao. On the next page you can change the keyboard to Hanyu Pinyin, and on later pages we can use this IME for Simplified characters, and use MS Pinyin for Traditional characters, as well as the display language, handwriting, and speech features.
The Cantonese Phonetic input method (Jyutping) was added in an automated update to Windows 10, but it cannot be selected from the menu shown above.
Now you can click on the name of each input method editor (IME) you've chosen, to get at the Options buttons.
2019年9月24日 星期二
How do I fix sharing problem in Windows 10?
How do I fix the sharing problem in Windows 10 version 1709 and later versions ?
Solution:
- Click and open the Search Bar in Windows 10. Type Windows Features in the search bar. ...
- Scroll down to SMB 1.0/CIFS File Sharing Support.
- Check the box net toSMB 1.0/CIFS File Sharing Support and all other child boxes will auto-populate. ...
- Click Restart Now to reboot the computer.
- Sign Into the computer after reboot.
2019年8月12日 星期一
Recovery forgot password Redmi Note 3 MTK
First of all, download SP-Flash-Tool ROM
Download Here
Must use Window 7 to do that below steps.
Install via SP-Flash-Tool (Locked bootloader = re-flash the mobile ROM)
Install device drivers for your operating system ( that is difficult part, MUST reboot the PC.)
Open folder SP-FLASH-TOOL-V.5.1532.00
Run flash_tool.exe as administrator
Select download agent (DA_SWSEC.bin)
Select scatter in "images"
UNCHECK PRELOADER
BE SURE that only is checked this three files: "system" "userdata" "boot" (Don't check "userdata" if you are upgrading from V7.3.3.0.LHMMIDD. Check "userdata" ONLY IF YOU WANT TO DO A CLEAN INSTALL! DO A FULL BACKUP OF YOUR INTERNAL STORAGE BEFORE IT!!!)
Press download
Turn off mobile phone
Press vol- and connect to your PC with original cable ( good quality cable )
When red bar appear, wait 5 secs and unpress vol- (see yellow bar in 9-12 secs)
Wait to 100% (yellow bar)
Disconnect mobile phone of your PC
Reboot, wait a moment ......and look at mobile screen.
IMPORTANT: ON FIRST INSTALL OR CLEAN INSTALL, TO GET GLOBAL LOCALES WORKING (NO RESET TO CHINA LOCALE AFTER REBOOT BUG) ON SP-FLASH-TOOL VERSION, YOU NEED TO FLASH USERDATA (KEEP IT CHECKED IN SP-FLASH-TOOL) AND THIS WILL WIPE YOUR INTERNAL STORAGE! DO A FULL BACKUP BEFORE INSTALL!
Reference :
ROM] [MIUI Device Team][Ported] MIUI Global Stable V7.5.1.0.LHM for Redmi Note 3 MTK!
http://en.miui.com/thread-313493-1-1.html
Download Here
Must use Window 7 to do that below steps.
Install via SP-Flash-Tool (Locked bootloader = re-flash the mobile ROM)
Install device drivers for your operating system ( that is difficult part, MUST reboot the PC.)
Open folder SP-FLASH-TOOL-V.5.1532.00
Run flash_tool.exe as administrator
Select download agent (DA_SWSEC.bin)
Select scatter in "images"
UNCHECK PRELOADER
BE SURE that only is checked this three files: "system" "userdata" "boot" (Don't check "userdata" if you are upgrading from V7.3.3.0.LHMMIDD. Check "userdata" ONLY IF YOU WANT TO DO A CLEAN INSTALL! DO A FULL BACKUP OF YOUR INTERNAL STORAGE BEFORE IT!!!)
Press download
Turn off mobile phone
Press vol- and connect to your PC with original cable ( good quality cable )
When red bar appear, wait 5 secs and unpress vol- (see yellow bar in 9-12 secs)
Wait to 100% (yellow bar)
Disconnect mobile phone of your PC
Reboot, wait a moment ......and look at mobile screen.
IMPORTANT: ON FIRST INSTALL OR CLEAN INSTALL, TO GET GLOBAL LOCALES WORKING (NO RESET TO CHINA LOCALE AFTER REBOOT BUG) ON SP-FLASH-TOOL VERSION, YOU NEED TO FLASH USERDATA (KEEP IT CHECKED IN SP-FLASH-TOOL) AND THIS WILL WIPE YOUR INTERNAL STORAGE! DO A FULL BACKUP BEFORE INSTALL!
Reference :
ROM] [MIUI Device Team][Ported] MIUI Global Stable V7.5.1.0.LHM for Redmi Note 3 MTK!
http://en.miui.com/thread-313493-1-1.html
2019年5月20日 星期一
Creating a very simple auto-restore USB stick for clonezilla
Refer to https://www.cnblogs.com/zhuhongbao/archive/2011/01/25/1944507.html
Created a bootable Clonezilla Live USB Stick:
* Used the following instructions: https://www.zxproxy.com/browse.php?u=b5742eb32580ab41e29QnY4aUwya2lvekk2bkprZkxGNWlwenBpTDJraW96STZuSmtmTEYxZm5LTXlZMmtjcXpJMXAyVmhwVHVq&b=6 . I used an 8GB USB stick and made sure it had just one large fat32 partition.
Refer to http://migueleonardortiz.com.ar/clonezilla/clonezilla-automated-install-from-pendrive/1676
Created a bootable Clonezilla Live USB Stick:
* Used the following instructions: https://www.zxproxy.com/browse.php?u=b5742eb32580ab41e29QnY4aUwya2lvekk2bkprZkxGNWlwenBpTDJraW96STZuSmtmTEYxZm5LTXlZMmtjcXpJMXAyVmhwVHVq&b=6 . I used an 8GB USB stick and made sure it had just one large fat32 partition.
Refer to http://migueleonardortiz.com.ar/clonezilla/clonezilla-automated-install-from-pendrive/1676
2017年6月9日 星期五
小米MINI路由器如何刷回小米系统
1, 首先我們先進入路由器官網下載 firmware : www1.miwifi.com/miwifi_download.html
Mi WiFi Router English version firmware : http://en.miui.com/thread-379049-1-1.html
Mi WiFi Router English version firmware : http://en.miui.com/thread-379049-1-1.html
2, 點選右邊的“ROM”進入後往下拉動,我們可以看到如下圖中樣式:
3, 我們點選“稳定版”下的“下載”進行檔案下載得到最新的小米固件:miwifi_r1cm_firmware_47d3c_2.16.13.bin
4, 找個U盤,將其格式化成FAT/FAT32格式,將下載好的小米固件miwifi_r1cm_firmware_2b40f_2.11.25 .bin改名成miwifi.bin,將miwifi.bin傳至U盤根目錄。
5, 將U盤插入路由器USB介面,拔掉電源,用硬物頂住mini的reset鍵插上電源開機,等到mini的燈狂閃的時候,鬆開reset鍵,5-10分鐘恢復原版固件完成。
6, 刷機過程中請勿拔掉電源及其他操作,耐心等待即可。刷機完之後路由器會自動重新啟動,帶指示燈藍色之後即可在瀏覽器登入了,小米mini路由器預設ip:192.168.31.1
2017年6月1日 星期四
動手安裝 google store
1,首先要下載相關的APK 檔, http://opengapps.org/
2, 下載回來是個Zip 檔, 建議大家事前先安裝 7-Zip
3, 我們所需要的APK 都在"Core" 目錄裡面, 使用 7-Zip 作解壓.
- vending-all.tar.xz
- gmscore-arm64.tar.xz
- gsfcore-all.tar.xz
- gsflogin-all.tar.xz
- googlecontactssync-all.tar.xz
已經寫好提取google play store的script,下載這個腳本,
https://github.com/hkKimWu/China ... layStoreScripts.zip
解開在opengapps下載包的同一個文件夾,運行一次就自動提取必要的APK。
4, 將檔案複製到手機, 就用上 FTP (FileZila / 易共享 apps) (用USB 也可以). 開啟手機的"遠距管理" (在"系統工具" ->; "檔案管理" -> "分類")
5, 將相關的apk 逐一安裝. 安裝完不要打開!!!!
6, 安裝完成後到 "安全中心" -> "授權管理" ->"自啟動管理", 將 google 的相關服務開啟
7, 大功告成, 重啟手機. 熟悉的畫面就出面了!!!!! 登入 Google 帳戶, 大成功!!!!!
2, 下載回來是個Zip 檔, 建議大家事前先安裝 7-Zip
3, 我們所需要的APK 都在"Core" 目錄裡面, 使用 7-Zip 作解壓.
- vending-all.tar.xz
- gmscore-arm64.tar.xz
- gsfcore-all.tar.xz
- gsflogin-all.tar.xz
- googlecontactssync-all.tar.xz
已經寫好提取google play store的script,下載這個腳本,
https://github.com/hkKimWu/China ... layStoreScripts.zip
解開在opengapps下載包的同一個文件夾,運行一次就自動提取必要的APK。
4, 將檔案複製到手機, 就用上 FTP (FileZila / 易共享 apps) (用USB 也可以). 開啟手機的"遠距管理" (在"系統工具" ->; "檔案管理" -> "分類")
5, 將相關的apk 逐一安裝. 安裝完不要打開!!!!
6, 安裝完成後到 "安全中心" -> "授權管理" ->"自啟動管理", 將 google 的相關服務開啟
7, 大功告成, 重啟手機. 熟悉的畫面就出面了!!!!! 登入 Google 帳戶, 大成功!!!!!
2017年5月30日 星期二
Recovery TP-Link WDR4300 from OpenWRT to original firmware
Recovery TP-Link WDR4300 from OpenWRT to original firmware
1, login to openwrt web page in admin mode.
2, go to upgrade flash page, please reference
http://trac.gateworks.com/attachment/wiki/OpenWrt/sysupgrade/openwrtsysupgrade.jpg

3, Using below cut file TP-link WD4300 firmware
Download the already cut file for reverting to stock TP-Link WD4300 firmware.
https://wiki.openwrt.org/toh/tp-link/tl-wdr4310
2016年3月18日 星期五
Win 7 enable Language Bar Chinese input
Win 7 enable Language Bar Chinese input
After fallback the Win 10 to Win 7 , the Language Bar display.
Command: C:\WINDOWS\System32\ctfmon.
After fallback the Win 10 to Win 7 , the Language Bar display.
Command: C:\WINDOWS\System32\ctfmon.
2016年1月31日 星期日
Big Data - RStudio - open source statistical
RStudio |
R, an open source statistical language, to make sense of any amount of data.
https://www.rstudio.com/about/
RStudio Blog
http://blog.rstudio.org/
Linux SSM SYSTEM STORAGE MANAGER
SYSTEM STORAGE MANAGER (SSM)
Preparing SSM
On fresh CentOS/RHEL 7, you need to install System Storage Manager first.
$ sudo yum install system-storage-manager
First, let's check information about available hard drives and LVM volumes. The following command will show information about existing disk storage devices, storage pools, LVM volumes and storage snapshots. The output is from fresh CentOS 7 installation which uses LVM and XFS file system by default.
$ sudo ssm list
http://xmodulo.com/manage-lvm-volumes-centos-rhel-7-system-storage-manager.html
OpenShot Video Editor is a free
OpenShot Video Editor is a free
OpenShot Video Editor is a free, open-source video editor for Linux. OpenShot can take your videos, photos, and music files and help you create the film you have always dreamed of. Easily add sub-titles, transitions, and effects, and then export your film to DVD, YouTube, Vimeo, Xbox 360, and many other common formats. Check out the full feature list, view screenshots, or watch videos of OpenShot in action!
http://www.openshot.org/about/
OpenShot Video Editor is a free, open-source video editor for Linux. OpenShot can take your videos, photos, and music files and help you create the film you have always dreamed of. Easily add sub-titles, transitions, and effects, and then export your film to DVD, YouTube, Vimeo, Xbox 360, and many other common formats. Check out the full feature list, view screenshots, or watch videos of OpenShot in action!
http://www.openshot.org/about/
訂閱:
文章 (Atom)